How to Clone Windows 7 via Clonezilla or Easier Cloning Tool
You will learn how to use Clonezilla in Windows 7 to migrate system to a larger drive as well as one more flexible way.
by Lily Updated on January 5, 2024
What is Clonezilla?
Clonezilla is a free and open source software for disk imaging and cloning. It absorbed the merits of both Norton Ghost and Partition Image. It supports not only cloning the whole system, but also doing bare metal backup/recovery. It is very flexible for users.
Clonezilla supports many file systems including ext2/ext3/reiserfs/xfs/jfs; Meanwhile, it supports FAT/NTFS on Windows system, which means you can use Clonezilla to clone not only GNU/Linux, but Windows operating system including Windows 10/8/7. Besides, Clonezilla can make a Multicast clone with PXEBoot, which is of great help for cloning a large number of systems.
Clonezilla has two versions - Clonezilla Live and Clonezilla SE. Clonezilla Live is designed to run on machines without installation. It can be operated through the LiveDistro on a medium like CD/DVD/USB, or the unicast service. Clonezilla SE uses the multicast to clone multiple disks. Clonezilla clones fast because it only clones the used part. It keeps the same size of a disk or partition, so you can use it to create a real clone.
👉 How to use Clonezilla in Windows 7 for system clone
👉 Best Clonezilla alternative to clone Windows OS (easier)🔥
How to use Clonezilla in Windows 7 for system clone
Before you start, do the following preparations:
- Download Clonezilla Live and burn it to CD.
- Connect a target drive that is large enough to hold all cloned data.
Then, follow the instructions below:
1. Boot your computer from the CD. For the first step, just click Enter.

2. Then, select language and the way your keyboard is laid out.
3. When the start screen displays, select "Start Clonezilla" and press Enter. Then, you can start to use Clonezilla to do a clone for your Windows operating system including Windows 7.
Although you can follow the wizard to finish the clone job, there are more than ten steps involved, which makes average users confused. And there are some limitations.
- The destination partition must be equal to or larger than the source one. In other words, you cannot clone larger drive to smaller drive via Clonezilla.
- All versions of Clonezilla live only support machines with legacy BIOS. If your machine comes with UEFI secure boot enabled, you have to use an alternative to Clonezilla live.
- The disk/partition to be imaged/cloned has to be unmounted...
Fortunately, there is other software that can replace Clonezilla.
Best Clonezilla alternative to clone Windows OS (easier)
AOMEI Backupper Professional is a powerful cloning tool that provides you with two ways to clone Windows 7 and other Windows systems: Disk Clone and System Clone. And there are other practical features.
- Disk Clone: It will clone the entire disk including the operating system, programs, files, system settings, etc.
- System Clone: It will clone only system partition and boot-related partition(s), which requires less disk space and cloning time.
- Intelligent Clone: The program clones only used sectors by default, thus you can easily clone system to a smaller drive.
- Compatibility: You can use AOMEI Backupper to clone HDDs/SSDs and MBR/GPT disks, regardless of disk brand.
Disk Clone or System Clone, which one should you choose? You can choose one of them depending on the disk space of destination disk. If it's big enough, it's suggested to clone entire disk so that you don't need to worry about data loss in other partitions. If not, clone OS only with System Clone feature.
Please download this software to have a try! It applies to Windows 7/8/10/11/XP/Vista. For server users, try AOMEI Backupper Server.
To clone Windows 7 with AOMEI Backupper, you can follow the steps listed below.
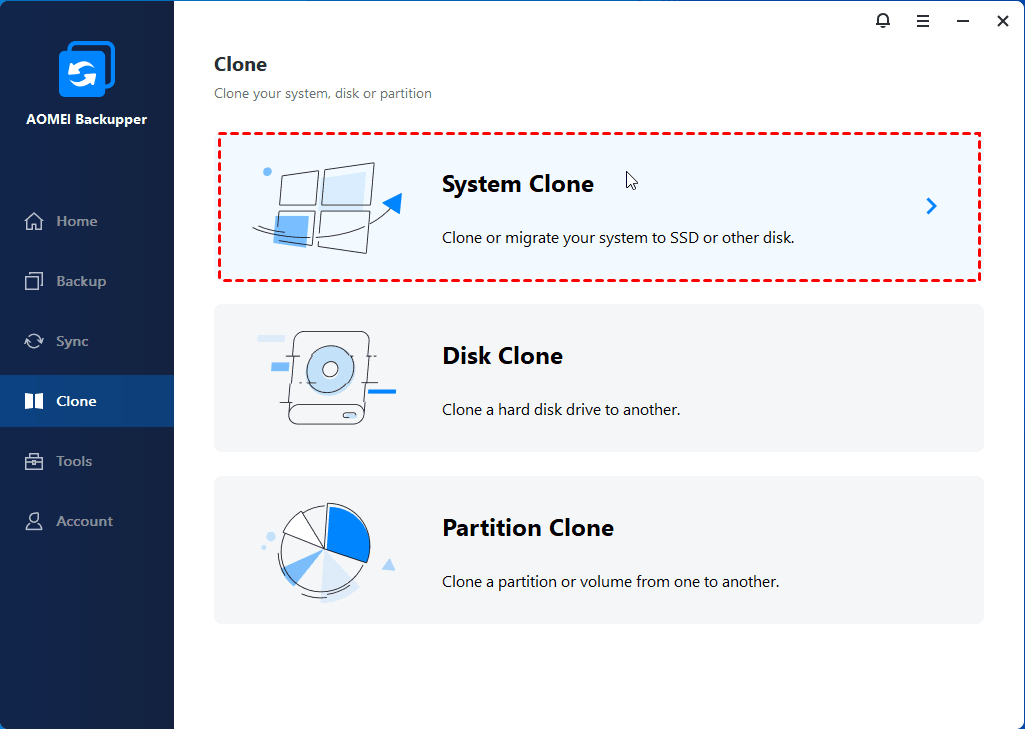
Step 1. Launch AOMEI Backupper Professional, and click System Clone under the Clone tab.
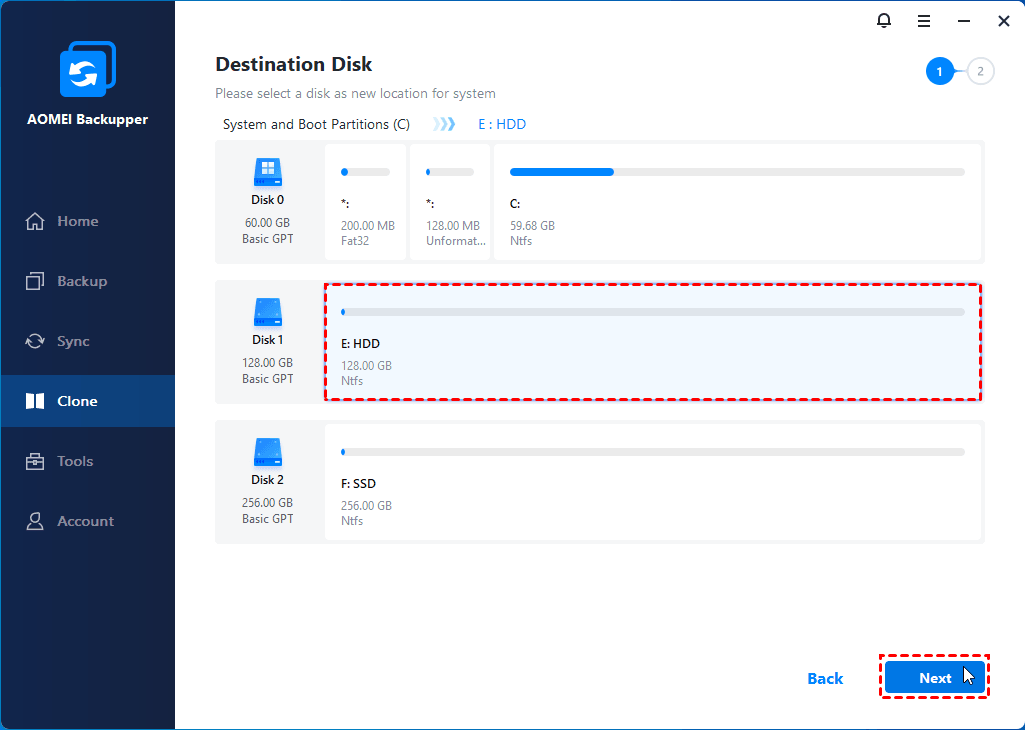
Step 2. By default, system drive and boot related partitions are selected. Here you need to select a destination path to put in your clone files. Select it and click Next.
Step 3. Here you will move to the Operation Summary, where you can confirm the information of your operation. If there is no problem, click Start Clone to launch the progress.
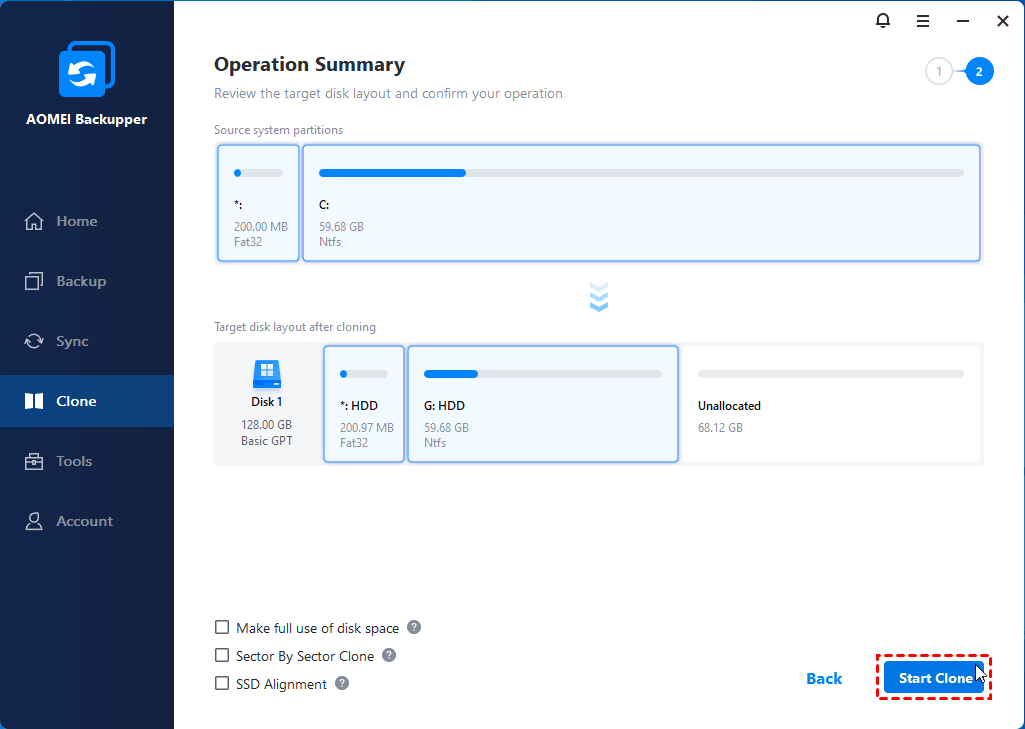
You can benefit from the following features if you enable it:
-
Sector by sector clone: it will clone every byte of the source partition, which takes a lot of time and occupy more space on your destination space. It's particularly useful while cloning a system disk, you don't need to worry about system reserved partition missing issue after cloning.
-
SSD Alignment: the function can optimize the performance of SSD, to be specific, so, if your destination space is an SSD, here we highly recommend you check it.
Afterward, you just need to wait for the process completes. Replace the old drive with the new one, or change boot order in BIOS to boot from the new disk.

Summary
You can use Clonezilla in Windows 7 for system cloning, but it's complicated and restricted. Thus, it's suggested to use AOMEI Backupper Professional to clone system in Windows 7.
With it, you can clone all brands of HDDs and SSDs, whether it's MBR or GPT. And cloning system from larger drive to smaller drive is supported. If you are cloning HDD to SSD, you can further improve the reading and writing speed of SSD disk.
Actually, AOMEI Backupper still has many other functions that Clonezilla cannot reach, such as create system backup image for Windows 7, synchronize files between two computers, etc.