How to Upgrade Windows 10 VM to Windows 11 - 2 Ways Here!
If you have a Windows 10 VM and want to upgrade it to Windows 11, read this article to learn two ways to go.
By Lily Updated on January 15, 2024
Can I upgrade a Windows 10 VM to Windows 11?
It has been more than one year since Windows 11 released. Many users have upgraded Windows 10 to Windows 11 to enjoy the new, powerful features. How about a Windows 10 VM? Can it be upgraded to Windows 11? Well, the answer is Yes.
However, the way to upgrade to Windows 11 may differ depending on the virtual machine software you use. In this article, I’ll talk about VMware Workstation. Two ways will be described below to help you upgrade a Windows 10 VM to Windows 11.
👉 Way 1: do in-place upgrade of Windows 10 VM to Windows 11
👉 Way 2: upgrade Windows 10 VM to Windows 11 with a Windows 11 image🔥
Way 1: do in-place upgrade of Windows 10 VM to Windows 11
Before guest OS upgrade, do the following preparations:
- Download Windows 11 ISO on your physical machine.
- Upgrade VMware tools to the latest version available for current Windows release.
- Take snapshot of the Windows 10 VM so that you can return to Windows 10 if something goes wrong.
- In Windows 10 guest OS, download and run PC Health Check app to check VMware Workstation Windows 11 compatibility.
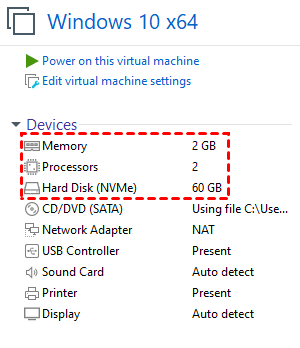
- Shut down the guest OS and change virtual machine configurations according to the result of PC Health Check when needed. Just choose the corresponding option from the left panel, such as Processors, Memory, and Hard Disk.
Notes:
● To enable UEFI and Secure Boot, click Edit virtual machine settings -> the Options tab -> Advanced.
● For adding vTPM device to an existing virtual machine, please refer to this VMware doc.
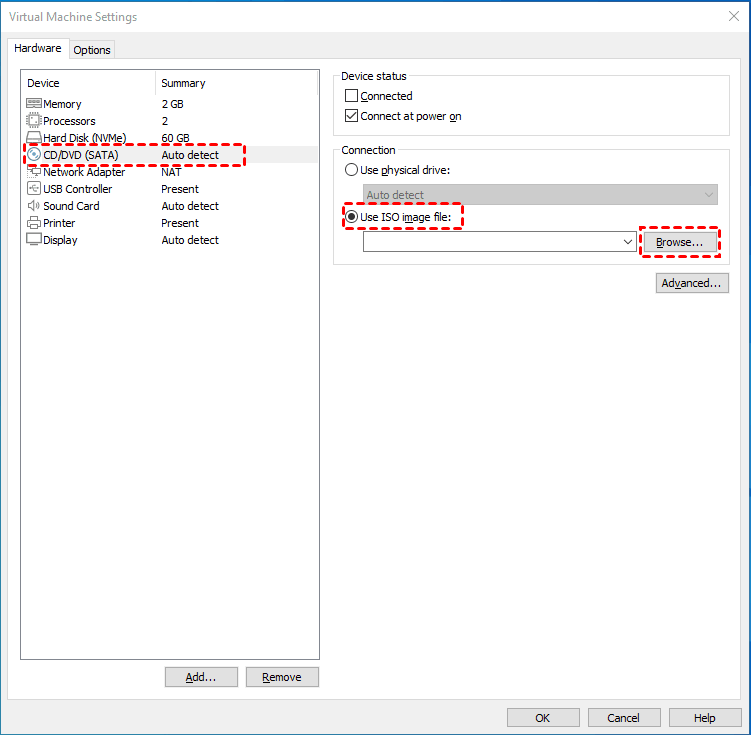
- Mount Windows 11 ISO file to the VM. Double-click CD/DVD from the left panel -> select Use ISO image file. Then click Browse to select the ISO file and click OK.
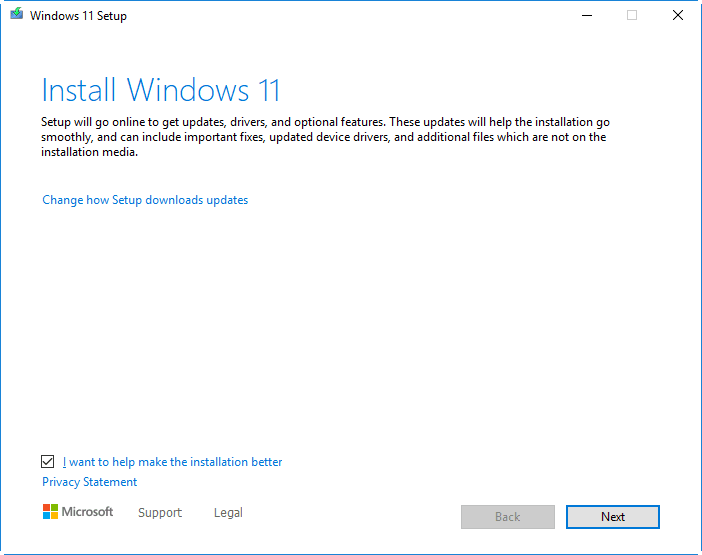
- Start the guest OS, open File Explorer and double-click DVD Drive -> the setup file.
- When the Windows 11 Setup wizard opens, click Next.
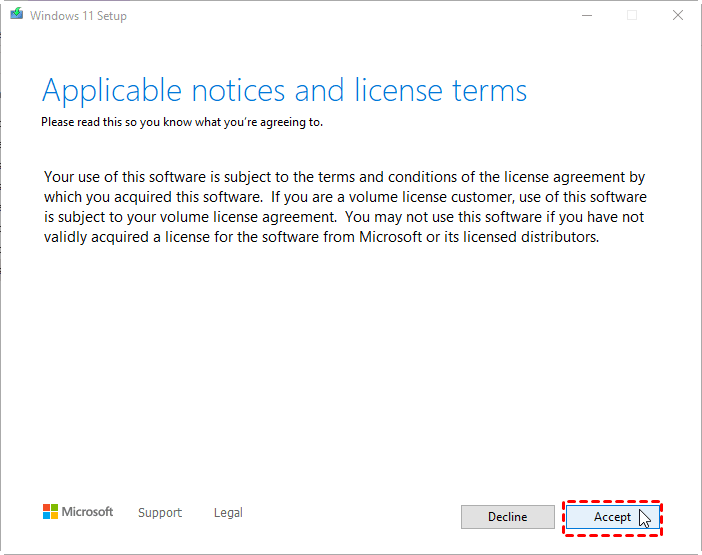
- It will check for updates and check your PC automatically. When you get into the “Applicable notices and license terms” page, click Accept to continue.
- At the “Ready to install” page, confirm the pending operation and click Install.
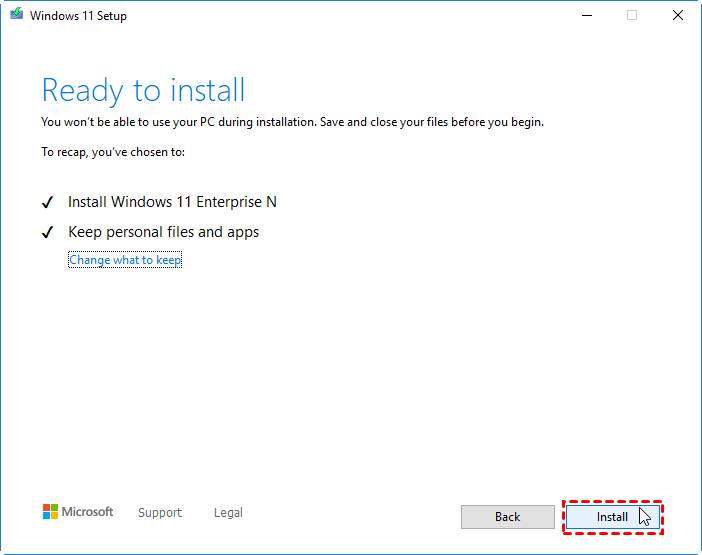
Note: By default, the installation process will keep your personal files and apps. You can change the default option by clicking Change what to keep.
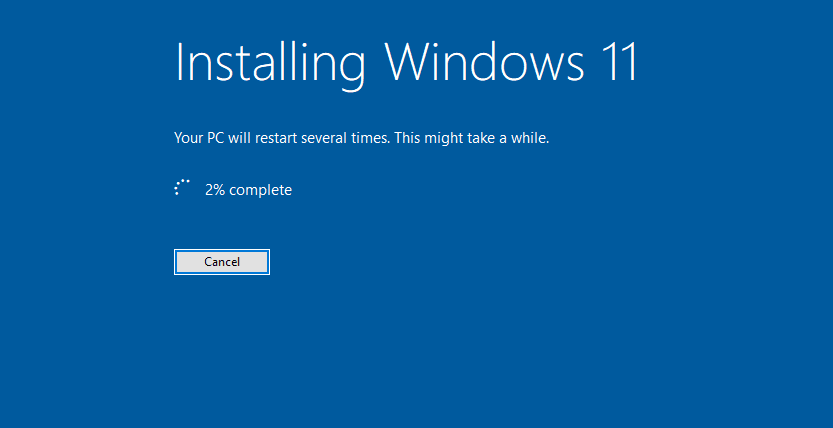
- Windows 11 installation starts, and the VM will restart a few times. Make sure you don’t turn off the VM.
- Upgrade or reinstall VMware tools after OS upgrade is done.
- Shutdown VM, and click Edit virtual machine settings -> the Options tab -> General. Then change guest OS version to “Microsoft Windows 11 (64-bit)”.
Notes:
● This method only applies to Windows 10, version 2004 or later.
● In-place upgrade is not recommended. The best practice is to fresh install Windows 11 on VM. You can create a new virtual machine with the downloaded Windows 11 ISO.
Way 2: upgrade Windows 10 VM to Windows 11 with a Windows 11 image
The best backup and restore software – AOMEI Backupper Professional can also help you upgrade a VM from Windows 10 to Windows 11.
- It allows you to create a system image for the OS or a disk image for the entire disk as per your need.
- You can save the backup image file to various locations, including external hard drive, USB stick, and network share, etc.
- It is embedded with the “Universal Restore” feature which ensures a bootable system after recovery.
Follow the instructions below to upgrade Windows 10 VM to Windows 11.
Step 1: create a Windows 11 system image
- Connect a USB flash drive to a Windows 11 PC. It should be large enough to hold your system image (better 128GB).
- Download and install AOMEI Backupper on the Windows 11 PC. Open AOMEI Backupper and click Backup -> System Backup.

- Select the USB drive to save the system image.

- Click Start Backup to begin system image creation.

Step 2: restore Windows 11 image to Windows 10 VM
- Connect the USB drive with system image to the PC where VMware is installed.
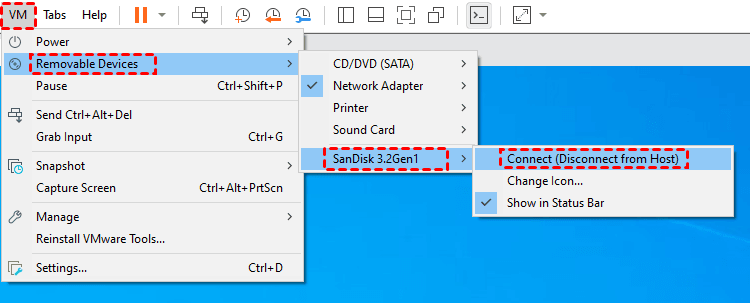
- Start Windows 10 guest OS. Then click VM -> Removable Devices -> your USB drive -> Connect (Disconnect from Host) to make the USB drive detected by the VM.
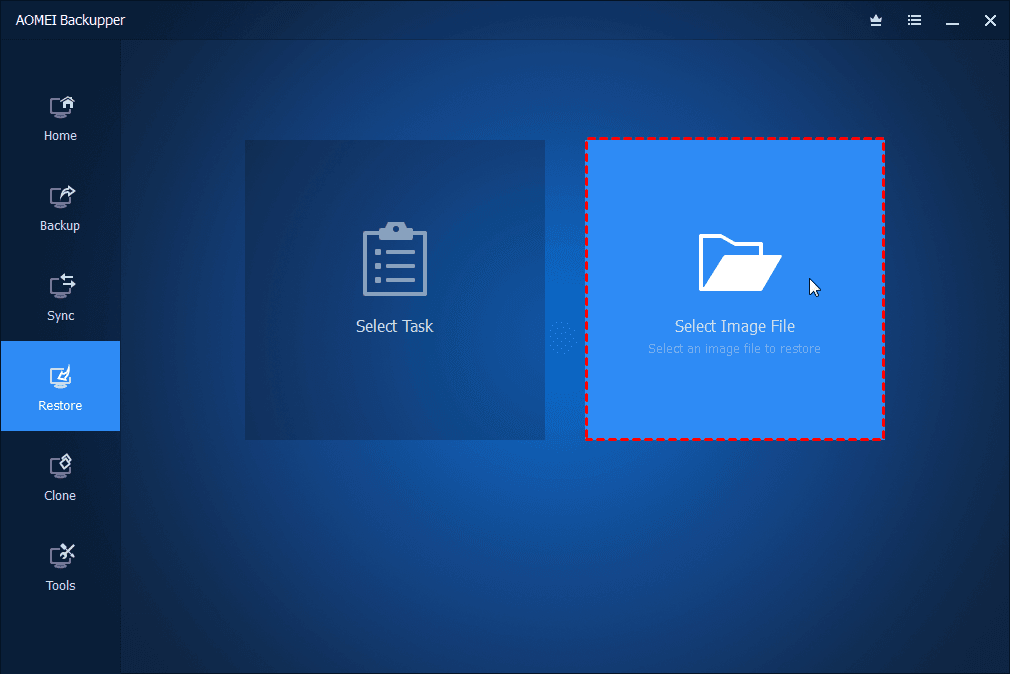
- Download, install and launch AOMEI Backupper on your VM. Then click Restore > Select Image File to locate the system image on the USB drive.
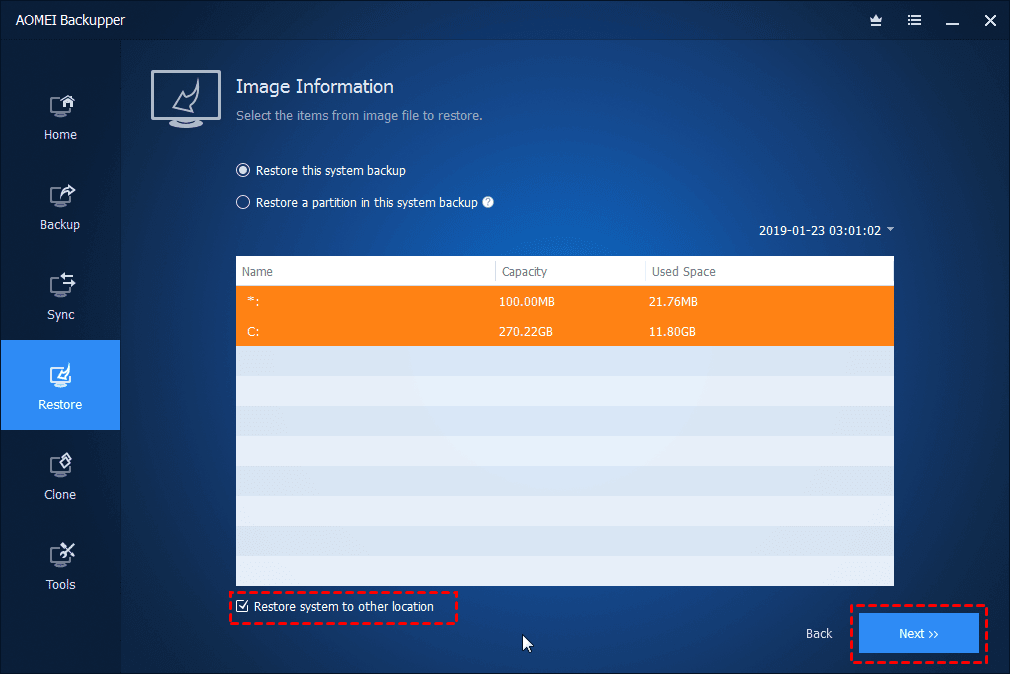
- Choose Restore this system backup, tick Restore system to other location in the bottom and click Next.
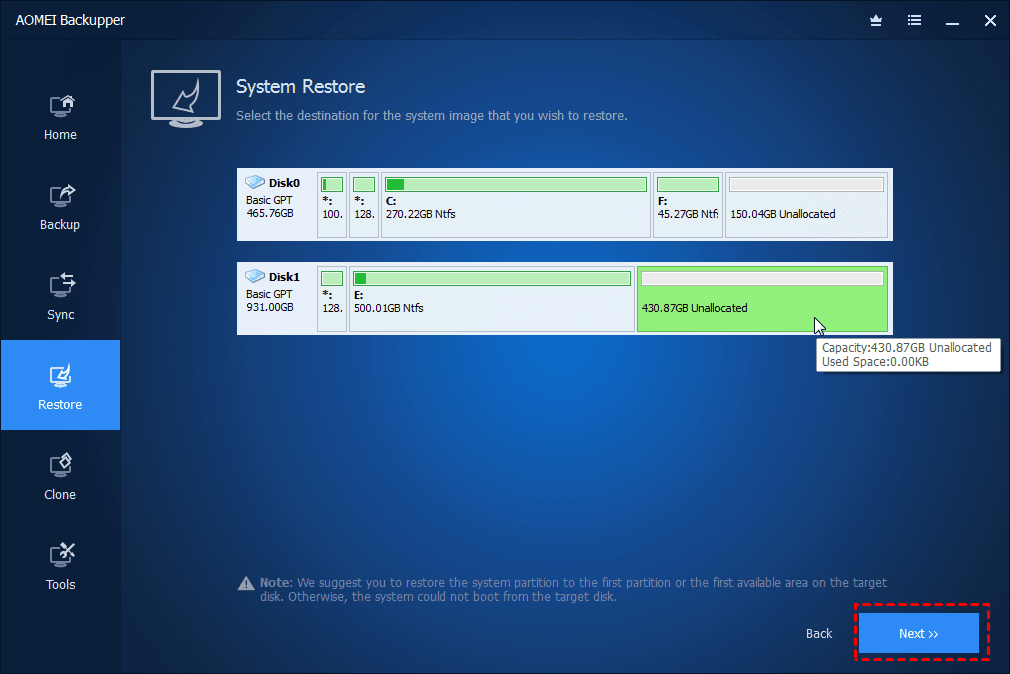
- Select the disk on your VM as the restoration destination and click Next.
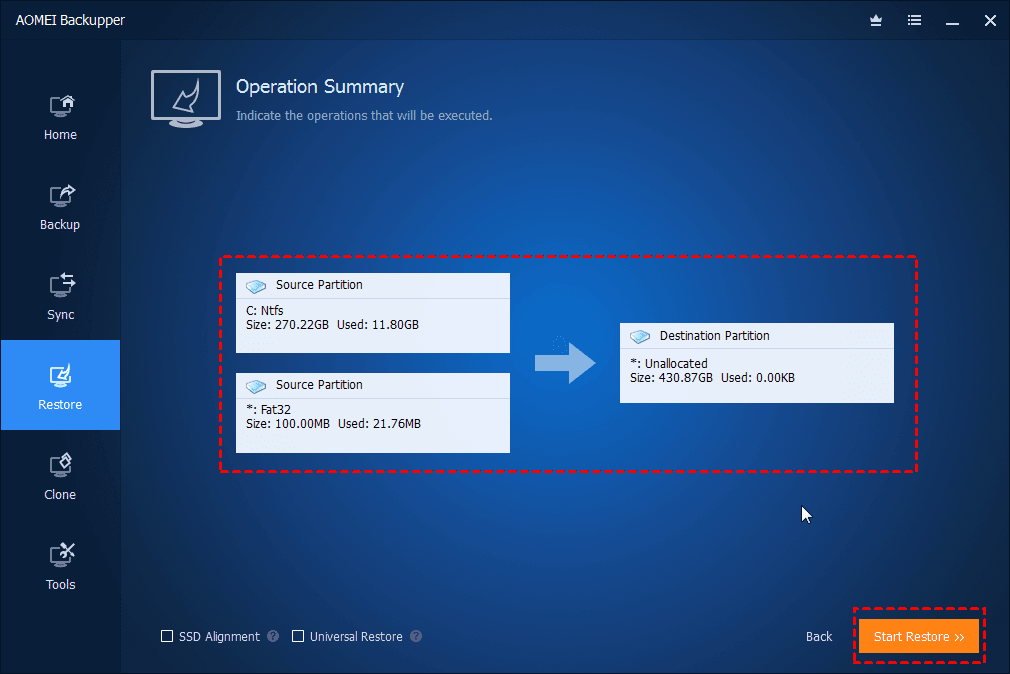
- In the “Operation Summary” page, preview the operation to be executed. Then, tick Universal Restore to ensure secure boot and click Start Restore.
Summary
If you need to upgrade Windows 10 VM to Windows 11, you can refer to the two ways offered on this page. Actually, AOMEI Backupper is far more than a backup and restore utility. It is also a disk clone tool and disk wipe tool. You can use it to clone NVMe boot drive and sanitize SanDisk SSD. Try it now to discover more!