
UFS Explorer Review: Is It Good in 2024?
We will give you a detailed UFS Explorer review on this page, you can know the main features, pros & cons, and more about it. Also, provide a top UFS Explorer software alternative for you.
By Lori / Updated on April 3, 2024
Data recovery software indeed plays a vital role in helping users recover their valuable data after accidental deletion or unexpected system failures.
Are you seeking reliable data recovery tools to retrieve your precious data? UFS Explorer data recovery is one such software solution that aims to assist users in recovering lost files efficiently.

This UFS Explorer review takes an in-depth look at UFS Explorer data recovery, revealing its capabilities and features. Keep reading to find out if is it good in 2024.
Key Features of UFS Explorer Professional Recovery
UFS Explorer is a sophisticated tool designed to help recover lost data from various storage media (hard drives, compact discs, flash cards, diskettes, etc.) even in complex situations. It can handle encrypted data, damaged hardware, and complicated RAID setups. The software's advanced features make it valuable for professionals dealing with challenging data recovery tasks.

In such a full UFS Explorer review, let’s learn more about it. Here are the main features of UFS Explorer Professional Recovery:
1️⃣ Virtual Disk Support: It works seamlessly with virtual disks from VMware, Hyper-V, VirtualBox, QEMU, and XEN. The software treats them like regular physical devices, allowing recovery from virtual machines stored on RAID or another virtual machine directly.
2️⃣ Encryption Support: It can decrypt commonly used encryption technologies such as LUKS, BitLocker, FileVault 2, APFS encryption, and eCryptFS. Users can input passwords/keys directly into the software for decryption, without the need to access the operating system.
3️⃣ RAID Recovery: It automatically assembles various RAID setups, including RAID 0, JBOD, RAID 1, RAID 1E, RAID 3, RAID 4, RAID 5, and RAID 6. It can even reconstruct defective RAIDs using parity or data copies.

4️⃣ Customizable Scanning: The software offers a quick scan for defined file system types, a longer profound search for lost data by known content, and scanning of the space used by the file system or just the “free space” areas. Scanning can be paused for intermediate results checking, and results can be saved for reference.
5️⃣ Advanced Disk Reading: Users can customize data access methods and set I/O timeouts to handle device errors. It offers a "read-once" option to reduce stress on unstable storage, saving processed information to a sparse image file.
6️⃣ Extensive Disk Imaging: It can create bit-to-bit copies of storage, allowing users to define specific disk ranges or select individual files for cloning. The imager has adjustable parameters like read timeout, block size, and settings to skip defective blocks.
👍 Pros:
Provide advanced options for creating disk images
Support for various storage technologies
Built-in disk decryption
Effective data analysis and editing
Support for Windows, MacOS, and Linux
👎 Cons:
Outdated user interface
High price
Only recover files small than 768 KB in the trial version
💲 Pricing:
UFS Explorer Professional Recovery: $ 629.95
How to Use UFS Explorer Professional Recovery for Windows
The process of UFS Explorer Professional Recovery is easy. Please recover deleted files in Windows 10 by following steps.
Step 1. Download UFS Explorer Professional Recovery from the official website on your Windows. Install and run it.
Step 2. Choose the drive that saved your deleted or lost data, and click Start scan.

Step 3. It will scan your drive. You can stop or pause the scan, but you can’t preview recoverable files before it is finished. Once the scanning is done, you can browse all recoverable files and sort files by date, type, name, or size.

Step 4. Choose the files you want to recover, and click Recover button at the top. Then, select the new location where the recovered files will be saved.

It's clear that UFS Explorer Professional Recovery was able to recover all test files without any issues, and it can handle more complex data recovery scenarios as well.
However, the tool is less intuitive, and using its wealth of advanced options can be difficult even for people with years of data recovery experience.
Best Alternative to UFS Explorer Software
If the complex advanced settings of UFS Explorer Professional Recovery are difficult for you to use. Might as well try another one excellent and versatile file recovery software - MyRecover.
It has a user-friendly interface and is perfectly able to work with deleted or missing files. MyRecover is acclaimed for its speed and high success rate in recovering deleted/missing files.

- Recover 200+ types of files:images, videos, MS Office files, WPS files, folders, ZIP, RAR, websites, etc.
- All-inclusive: Apply to a variety of data loss scenarios such as deletion, disk formatting, system crashes, virus infection, and more.
- Advanced scanning method: MyRecover runs Quick Scan & Deep Scan automatically to search all the recoverable files on your selected drive.
- Enabling advanced file filtering and preview by Files Type, Size, Date, etc. to save your time and effort.
👍 Pros:
Retains original file formats, filenames, directories, and sizes for recovered files in the Deleted Files folder.
Provide thorough results.
Cheap price
👎 Cons:
Lacks support for Mac and Linux
💲 Pricing:
| Free Version | MyRecover Pro | MyRecover Technician | Availability | |
| Monthly | $0.00 | $39.95 | $99.00 | Upgrade now >> |
| Yearly | $59.95 | $199.00 | ||
| Lifetime | $69.95 |
$299.00 |
||
| Differences | Recover data free 500MB | Recover unlimited data on 1 computer/license | Recover unlimited data on unlimited computers/licenses |
Here are the steps for using MyRecover to recover deleted files from hard drives. Have a try!
Step 1.Install and run MyRecover. Hover the mouse over the drive saved deleted files before, and click Scan.

Step 2. MyRecover will scan your drive automatically and thoroughly to locate all the found data.

- Type: Select the file type (Documents, Images, Videos, Audios, Mails, Webpages, Compressed files, etc.)
- Date modified: Set the date (today, yesterday, last 7/30 days, etc.)
- Size: Filter the file size (<128KB, 128KB~1MB, 1MB~ 512MB, 512MB above, etc.)
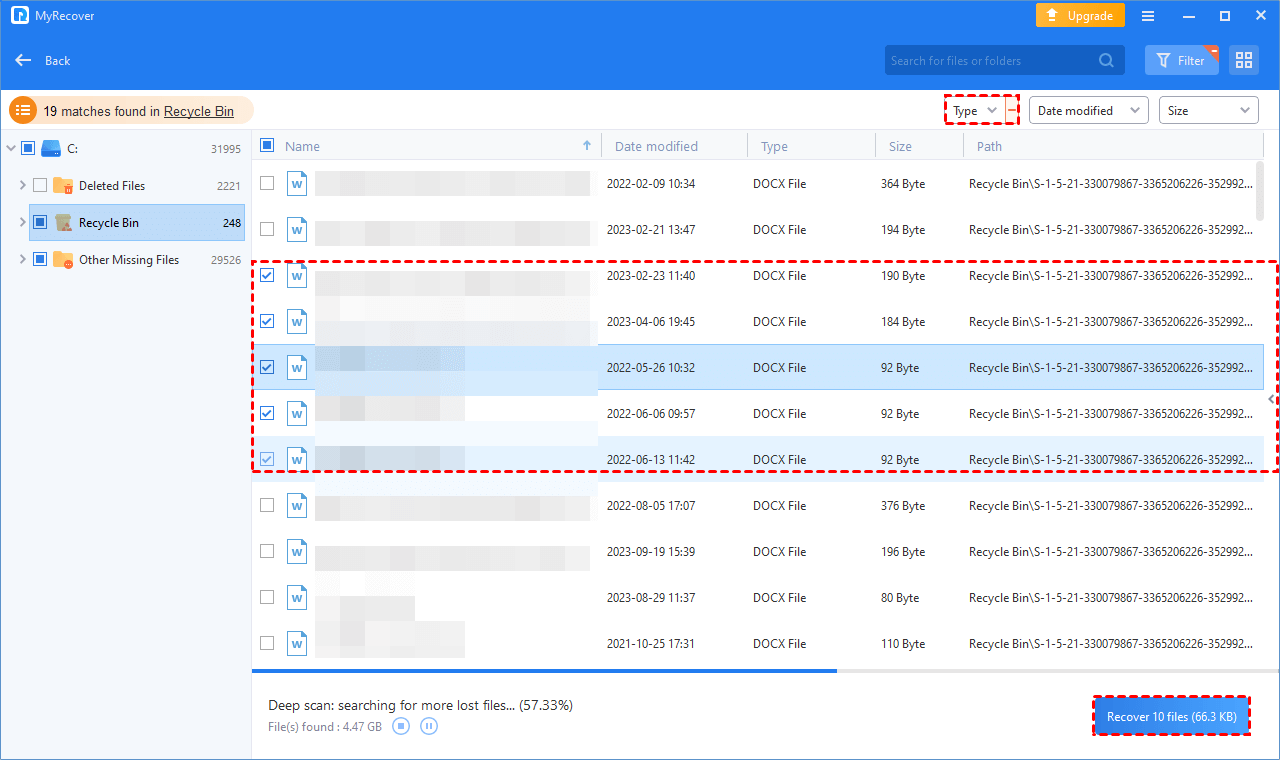
Step 3. A list of data found by MyRecover will appear. Choose your desired files to recover, and click Recover x files. The Recover button displays the number of selected files and their total size, allowing you to review their integrity before restoration.
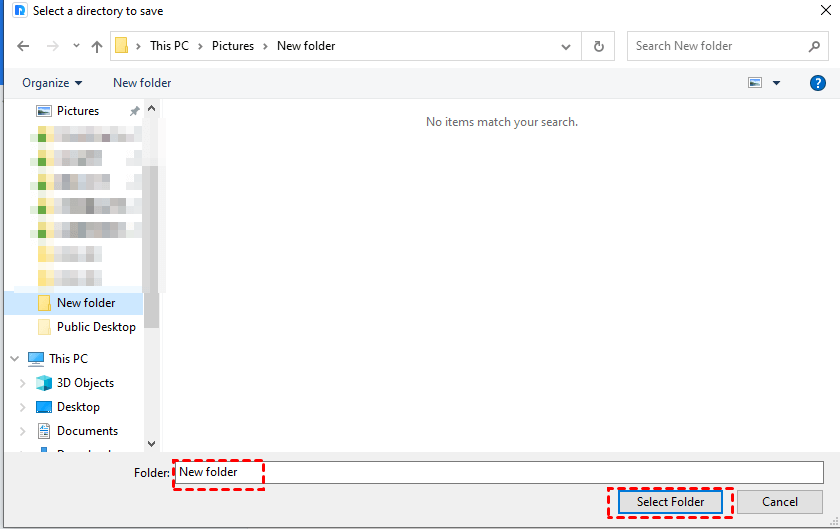
Step 4. Select a new location to save the recovered files and click Select Folder to confirm it.
FAQs
Are UFS Explorer software tools safe to use?
Are there any cheaper alternatives to UFS Explorer Professional Recovery?
Is UFS Explorer Professional Recovery free?
What is UFS Explorer Standard Recovery generally used for?