How to Recover Data from Buffalo NAS Drive Quickly
You can easily recover data from Buffalo NAS drive as long as you find a reliable way to complete it. We will introduce you to two kinds.
By Ivy / Updated on May 9, 2024
What Is Buffalo NAS Device?
The Buffalo NAS device is an efficient network-attached storage solution that enables authorized users, both on-site and remote, to access files, documents, and other data without requiring a direct connection. You can also back up important data to Buffalo NAS to prevent any data loss.
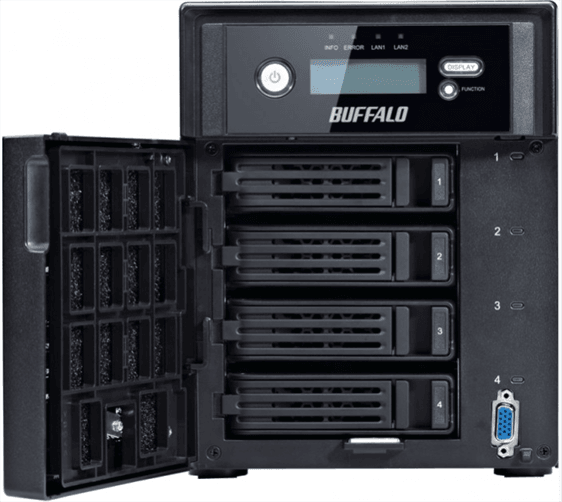
Buffalo now offers two primary series of NAS devices: LinkStation and TeraStation, ideal for storing large business files. They offer top security against cyber-attack and ransomware and have an amazing transfer rate. They usually contain multiple hard drives using the XFS file system and the capacity ranges from 2TB to 40TB. In addition, the business NAS drive also has a cloud backup to keep your data safe.
Common Reasons Behind Data Loss on Buffalo NAS Drive
Buffalo NAS is secure, reliable, easy to use and has a high quality. But it may still cause data loss. Here are some reasons behind data loss on Buffalo NAS drive:
- Accidental deletion.
- Failed NAS drive.
- Faulty firmware.
- Physical damage, such as electrical damage, overheating, etc.
Empowering Buffalo NAS Data Recovery Software
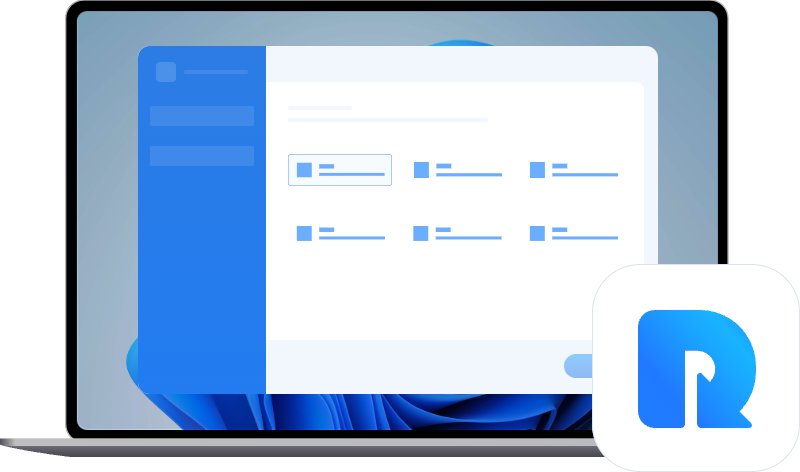
Recovering data from a Buffalo NAS device can be a challenging task. It’s time-consuming and not 100% guaranteed. To recover data from Buffalo NAS drive easily, using reliable data recovery software will be a great choice. We strongly recommend you use MyRecover. It is pretty straightforward and even novices can use it smoothly.
- A wide range of NAS drives, such as Buffalo, Synology, WD My Cloud, QNAP, etc are supported.
- Compatible with 200+ file types, such as Word/Excel/PPT documents, images (eg: x3f file recovery), audio files, videos, compressed files, etc.
- High success rate and fast speed: recover Buffalo NAS drive or other devices in Windows 7, 8, 10, 11, etc, and Windows Server easily and quickly, with a success rate of more than 95%.
- All-inclusive data loss scenarios, such as accidental deletion, disk format (eg: recover data from a formatted drive), virus infection, inaccessible disk error, etc.
Comprehensive Guide to Recover Buffalo NAS Hard Drive
Before starting Buffalo NAS data recovery, you need to disconnect the Buffalo hard drive and connect it to a PC with data recovery software. If your computer does not have an extra slot, please prepare a connector (eg: USB to SATA) as well.
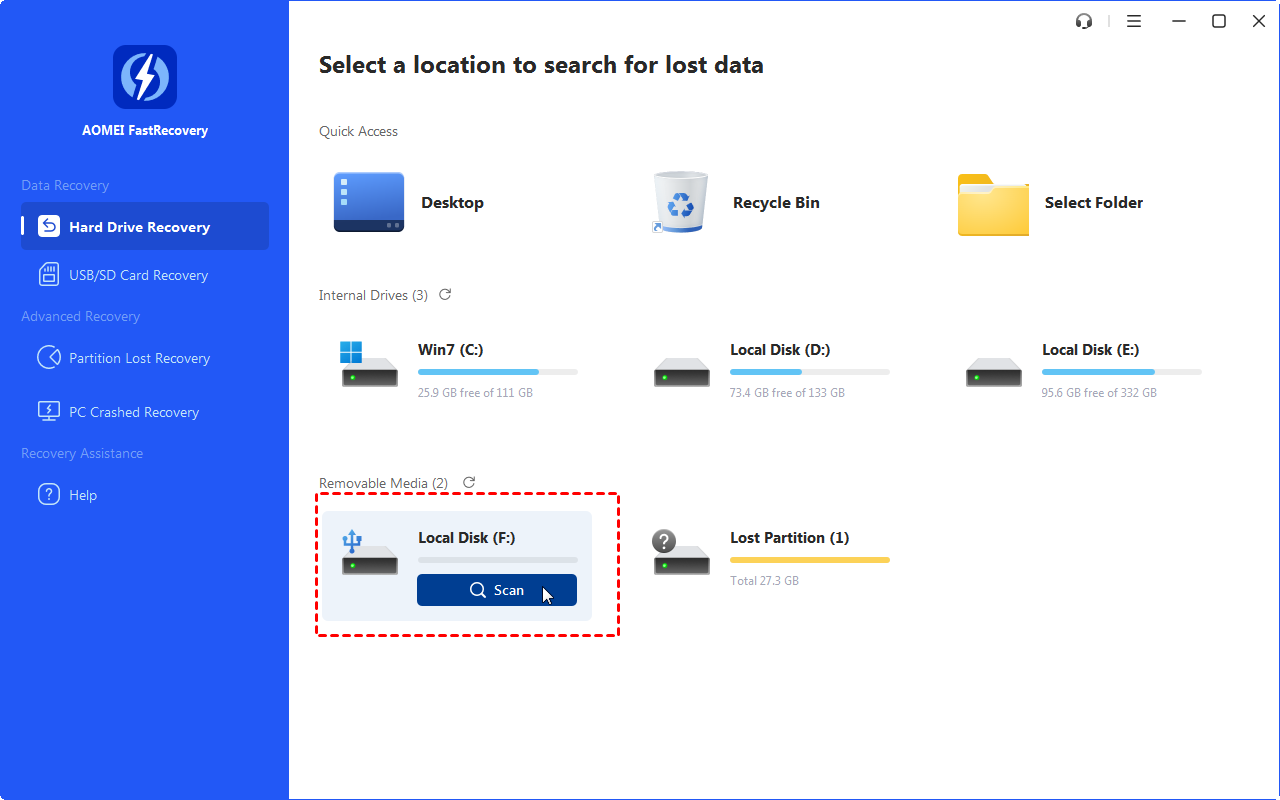
Step 1: Hover the mouse over the desired NAS drive and start the scanning process.
Download and install reliable data recovery software - MyRecover. It will display all the available drives. Hover the mouse over the Buffalo NAS drive and click Scan.
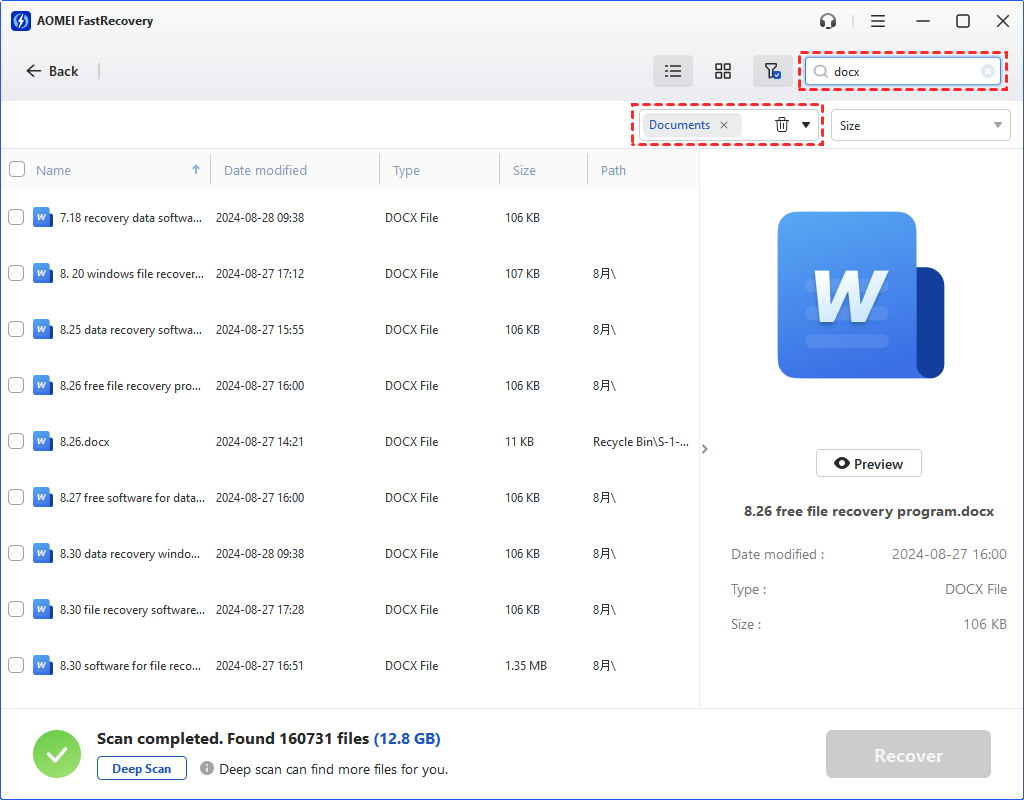
Step 2: Preview deleted or lost files on Buffalo NAS drive.
MyRecover will start its two advanced scanning methods and search for deleted or lost files quickly. You can filter and preview files in the Buffalo disk. Here are two methods:
- Click Filter and select a file type, such as Documents.
- Expand the Other Missing Files tab and go to the folder containing deleted files.
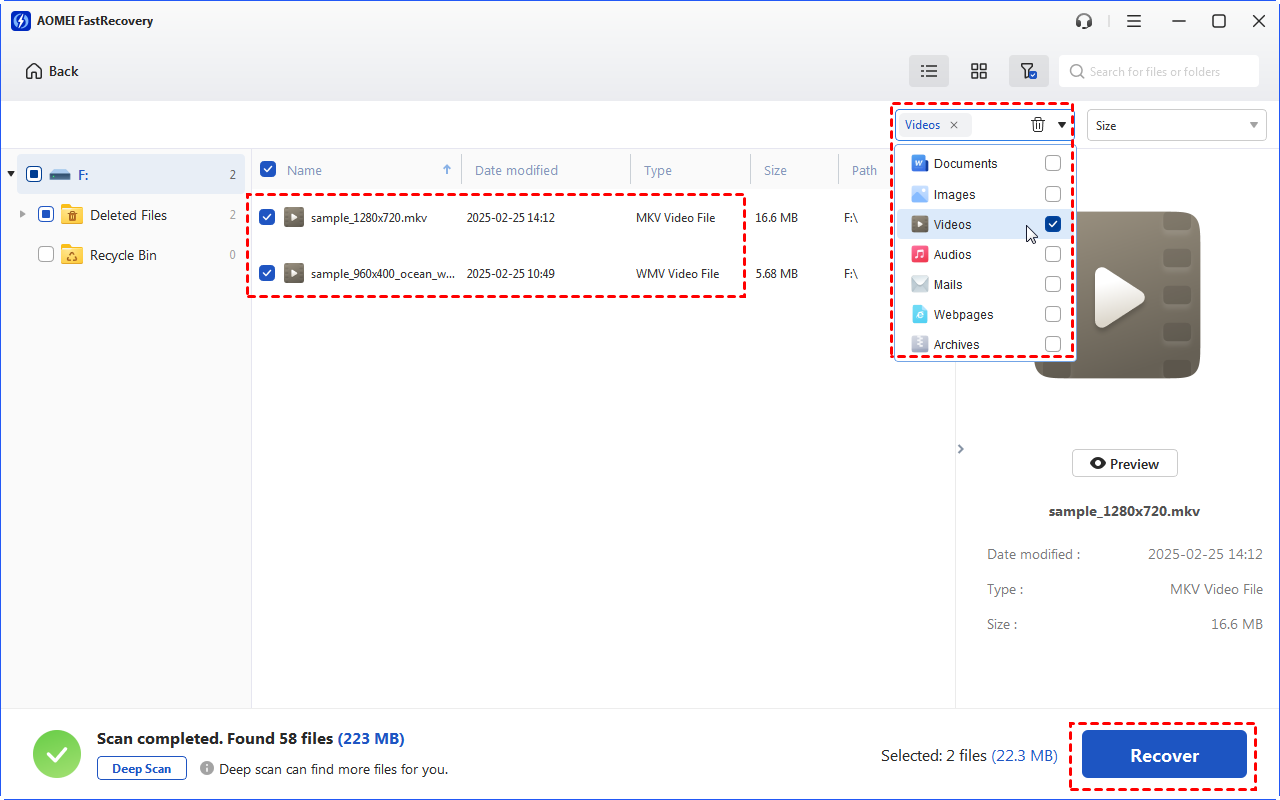
Step 3: Start Buffalo NAS recovery.
Once the scanning process completes, select Buffalo NAS data and click Recover xxx files. You will then be asked to select a location. Please select a new location instead of the original location.
Notes:
- The restore button will display the number of selected files and their full size. You can use it to determine the integrity of the recovered files.
- Saving the recovered files to their original location may cause data corruption or further data loss.
- In addition, you can also use it to recover WD My Cloud drive, Seagate NAS, Synology NAS, etc as well as other devices.
MyRecover offers 500MB of data recovery for free. For larger data volumes, you need to upgrade to the advanced editions.
Additional Assistance - Buffalo Data Recovery Service
Buffalo teamed up with an award-winning data recovery service - DriveSavers and claimed “No data recovered, No Charge. No shipping fee”. Unlike traditional service, except for direct attached storage, it also offers a secure network attached storage. In this way, it will directly upload data to your new NAS device without requiring an extra device.
If you register a qualifying TeraStations and the device is still in its original warranty, the DriveSavers will offer you free data recovery services for a device with simple logical issues. It requires additional cost to receive NAS as target media.
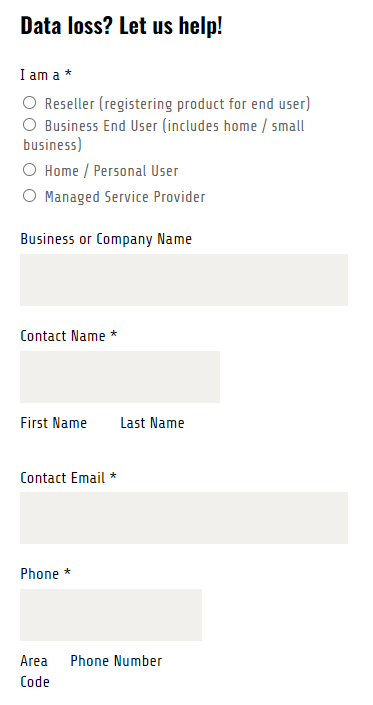
To recover Buffalo NAS hard drive, please go to Buffalo's official website. Fill in the detailed information and submit your request. It will evaluate your device for free and contact you with the specified email address. The price may vary, depending on data loss severity. If you agree, they will start a data recovery service and return your data back (if the recovery task is successful).
Beneficial Buffalo NAS Data Protection Solution
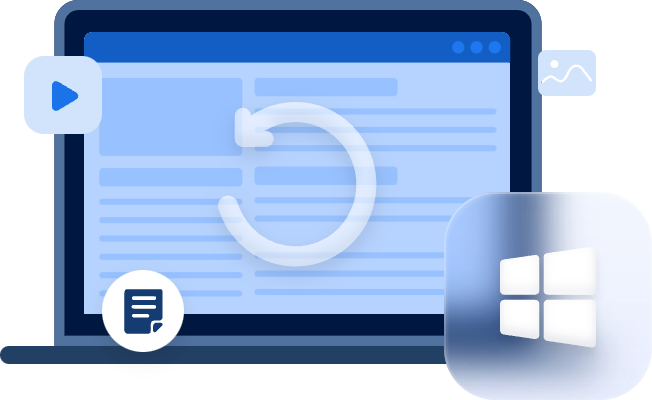
To ensure the safety of your stored files and documents, you can also consider utilizing free Windows backup software - AOMEI Backupper Standard to backup Buffalo NAS device.
- It enables you to create manual backups or automatic backups on a daily, weekly, or monthly basis as well as specific events and devices.
- You can save your data on another NAS device, or other devices like external hard drive, USB drive, network drive, and cloud drive.
- With its Create Bootable Media feature, you are capable of backing up Buffalo NAS without booting Windows.
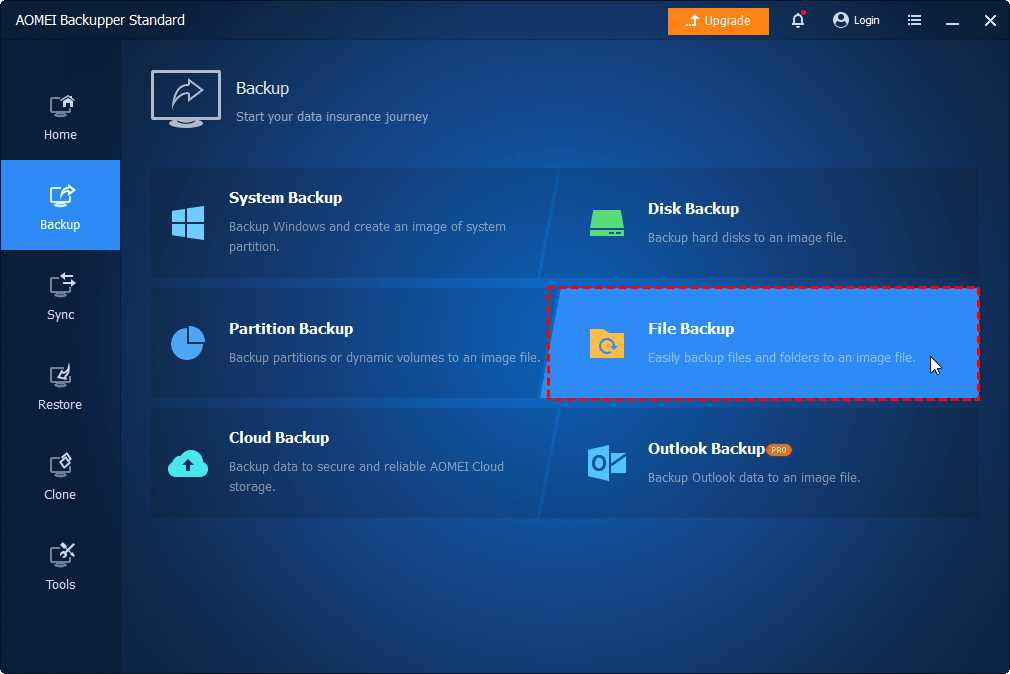
Step 1: Specify the backup feature.
Download and install free backup software - AOMEI Backupper Standard. Launch it, select Backup and File Backup.
Step 2: Add Buffalo NAS and select the files you want to backup.
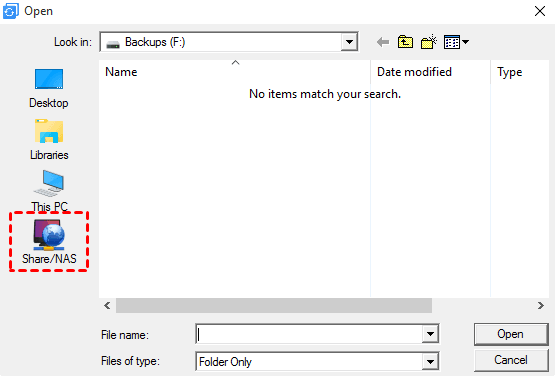
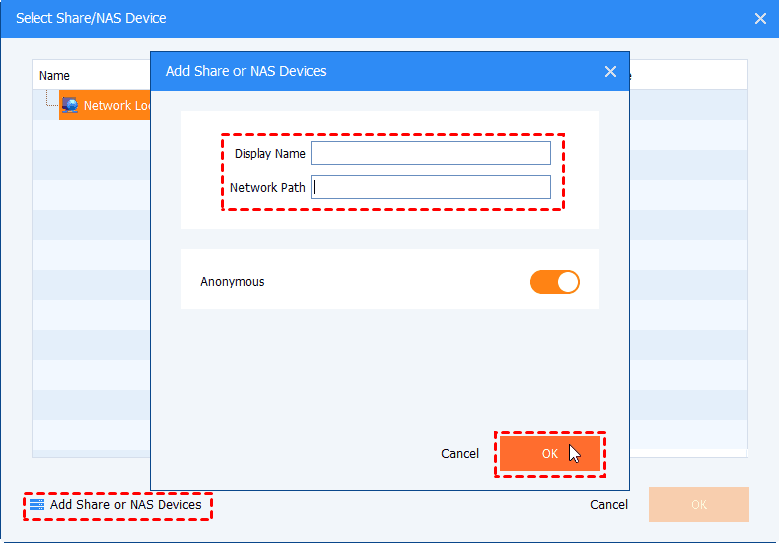
- Click Add Folder or Add File > select Share or NAS.
- Click Add Share or NAS Devices. Then type a display name, network path, user name, and password and click OK to add the Buffalo NAS.
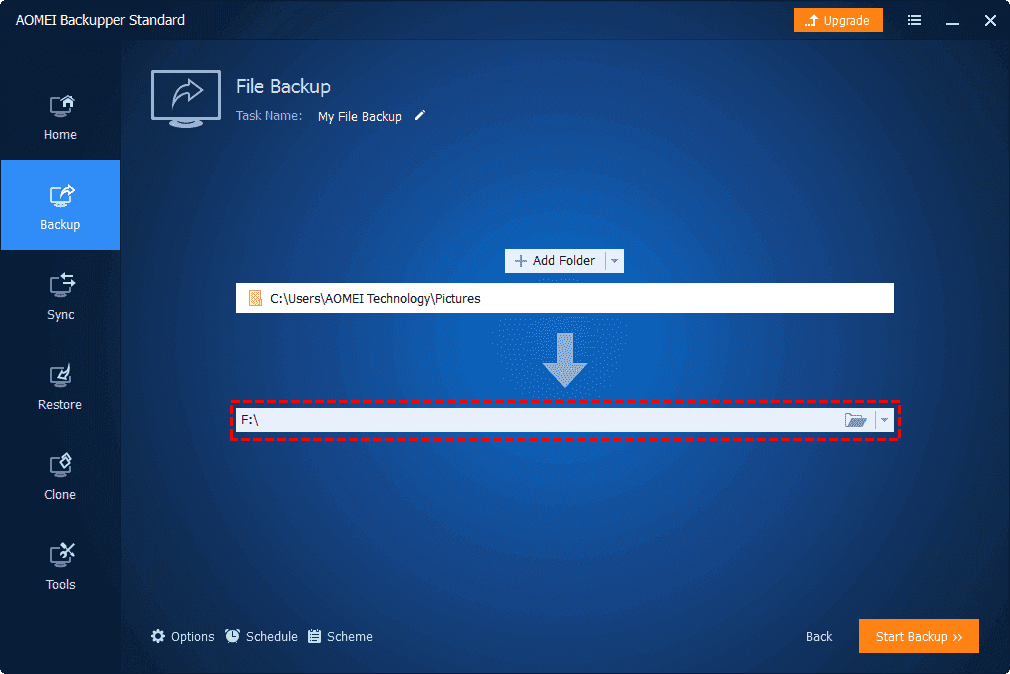
- Select one or more folders on Buffalo NAS.
Step 3: Select the location to save Buffalo NAS data.
Click the dropdown, select a local path, share or NAS, or cloud drive, and specify a device, such as an external disk.
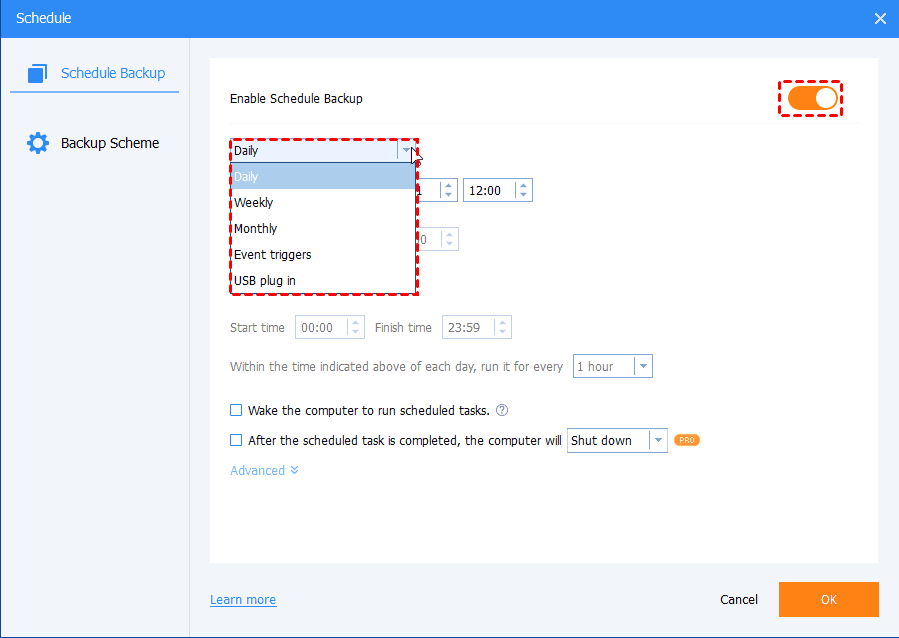
Step 4: Set scheduled backup settings.
Click Schedule Backup > Enable Schedule Backup and select Daily, Weekly, Monthly, Event trigger, or USB Plug in.
- Daily, weekly, monthly: Choose them based on how often your Buffalo NAS data changes. In general, the more frequently data is modified, the shorter the backup interval.
- Event trigger: support system startup, system shutdown, user logon and user logoff. Select them based on your working habit.
- USB Plug in: a plug-and-pull feature. Backup Buffalo NAS to USB drive automatically when the drive is plugged in.
Step 5: Backup Buffalo NAS data to an external disk.
Finally, confirm the selected data on the Buffalo NAS device and click Start Backup to backup data on Buffalo to the external hard drive.
FAQs Regarding Buffalo NAS Data Recovery
1. How can I access my Buffalo NAS?
Step 1: Prepare an Ethernet cable, connect the Buffalo NAS, and power it on.
Step 2: Press the Power button. Wait until the power LED stops blinking.
Step 3: Open a web browser and enter the IP address of the NAS device. If the IP address is unknown, use NAS Navigator instead.
2. How do I copy a file in Buffalo LinkStation?
Step 1: Connect USB devices to the Buffalo LinkStation.
Step 2: Press the blue function button. It will automatically copy data from the USB to the LinkStation.
Step 3: Safely remove the USB drive after it is dismounted.
3. How can I update Buffalo LinkStation firmware?
Step 1: Enter the model number on the Buffalo downloads page. Then, go to the firmware section, and select the firmware update utility.
Step 2: Right-click on the zip file and choose Extract All.
Step 3: Open the file TSUpdater.exe and select the specific unit for the update. Type the password and click OK.
Conclusion
MyRecover is a reliable & effective data recovery solution for different storage devices, such as Buffalo NAS. With it, you can easily recover data from Buffalo NAS drive in a short time, whether it’s accidentally deleted or in other data loss scenarios.
It supports two advanced scanning methods and recovering 200+ file types, with a success rate of more than 95%. Not only Buffalo NAS devices, but also other NAS brands, such as QNAP, Synology, Lacie, Iodate, and more.